Dcm Burner Support
DcmBurner Epson Disc Robot Settings
STEP 1 - FINISH DcmBurner INSTALLATION
STEP 2 - INSTALL AND CONFIGURE EPSON SOFTWARE
1. Epson Total Disc Maker
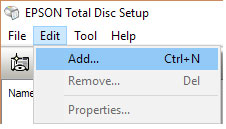
2. Epson Total Disc Setup

Register your printer as above.
3. Epson TD Bridge
During Epson TDBridge installation, change the default watch folder path to - C:\dcmburner\jobs Download and install Epson TDBridge , always check Epson website for latest versions. Epson PP-50 Robot require TD Bridge activation. Activate TD Bridge by clicking 'DiscProducerActivationTool.exe' in the TD Bridge installation directory.
4. Install Epson Total Disc Monitor
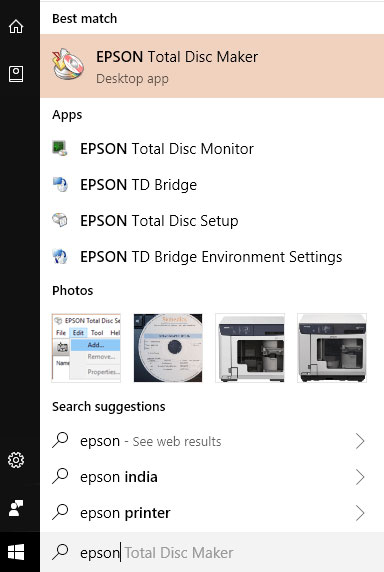
After all installations, you should have these five entries in Windows startup menu.

If your PC ask for a reboot, do it.
STEP 3 - PRINT A DEMO CD
- Open Epson TD Bridge Environment settings and check the default, input/out/stacker selections.
- See the disc type & bin settings in DicomBurn 'Disc Rules' (middle screen). Same settings must be applied in the stacker selections or vise-verse.
- Open Epson Total Disc Monitor and see if the message says it is ready for publishing.
- Open Epson Total Disc Maker, create a Job for the printer, make sure to add few files for burning and choose a label file for printing.
- Burn it to the new printer.
- Check the CD content and the label
- If all is not good, fix the printer/printing parameters, ink, lid, whatever to get the pending job done.
STEP 4 - PRINT A DICOM DISC
- Keep the Epson Total Disc Monitor running, this will give the real time progress/error updates.
- On DcmBurner Setting screen select Media Config Option Media target as Epson CD or Epson DVD based on the Epson TD Bridge Environment settings, And put CD or DVDs accordingly into the printer.
- Now, push some studies to DcmBurner, and watch it.
STEP 5 - CHANGE LABEL DESIGN
If all is good, you can change the DcmBurner default label file to your facility name, logo, a new design etc.
The default label file is in C:\dcmburner\tools\epsoncdlabel.tdd.Backup epsoncdlabel.tdd file,And copy it,Then open it in Epson Total Disc Maker, and do the changes,If want use new tdd file,You can change On DcmBurner Setting screen select Media Config Option and change Label File Path field.